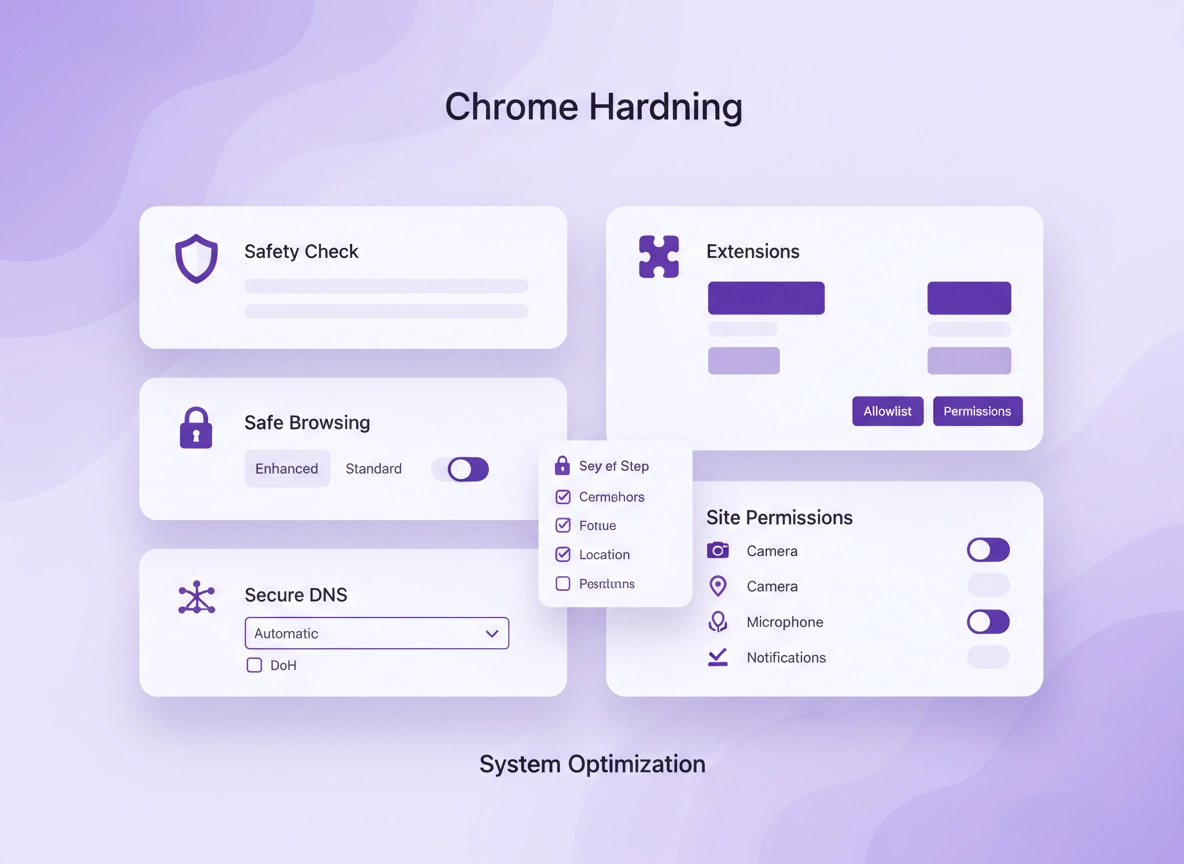
What Chrome hardening is (and what it isn’t) .
Hardening is the practice of reducing your browser’s attack surface: fewer places where phishing, malware, tracking scripts, or risky extensions can succeed. In Chrome, that usually means three things: (1) stronger built-in protections, (2) tighter permissions and privacy controls, and (3) smarter extension discipline.
It’s also important to define what hardening is not. Hardening won’t magically make unsafe behavior safe. If you reuse passwords, click unknown download links, or install “free VPN” extensions that ask to “read and change all data,” a perfect settings checklist won’t save you every time. The goal is to reduce how often one mistake becomes a real incident.
In real-world security terms, Chrome hardening helps defend against common browser-delivered threats:
- Phishing and credential theft (fake login pages, typosquatting, malicious redirects)
- Malware delivery (drive-by downloads, deceptive installers, fake updates)
- Extension-based compromise (a “useful” extension becomes spyware after an update)
- Tracking and profiling (ad networks stitching behavior across sites and sessions)
- Session hijacking risk (shared devices, weak account controls, careless sync usage)
Related: If you want the broader hub first, start here: Chrome Privacy Settings. If you’re here because something feels “off” (pop-ups, redirects, strange toolbar), use: Remove Malware from Chrome.
Key terms (quick definitions) .
- Attack surface: All the ways an attacker could exploit Chrome (extensions, permissions, weak defaults, unsafe content).
- Safe Browsing: Chrome’s built-in protection that warns about dangerous sites/downloads. Enhanced mode adds stronger protection signals but shares more security telemetry. :contentReference[oaicite:2]{index=2}
- Safety Check: A Chrome scan that checks protections, extensions, and compromised passwords. :contentReference[oaicite:3]{index=3}
- Secure DNS (DoH): Encrypts DNS lookups to reduce network-level snooping and some forms of tampering. :contentReference[oaicite:4]{index=4}
- Allowlisting: A security approach where only approved extensions/settings are allowed (common in enterprise). :contentReference[oaicite:5]{index=5}
Before you start: threat model + fast checks .
Hardening works best when you match settings to your actual risk. A freelancer using client dashboards on public Wi-Fi needs a different baseline than a gamer on a single desktop. Take 60 seconds and pick the closest profile:
- Low risk (basic): personal browsing, few accounts, no sensitive portals → focus on Safe Browsing, permissions, and cleanup.
- Medium risk (typical): email + banking + shopping + social → add Secure DNS, stronger permissions, extension control, and safe sync choices.
- High risk (professional): admin portals, finance/healthcare/legal, or public Wi-Fi → treat extensions like software, consider separate profiles, and use policy-like discipline.
- Enterprise/IT: managed devices, compliance requirements (SOC 2 / HIPAA / GDPR) → enforce baselines via policies and logging where required.
Related: If you manage Chrome at work or school, you’ll like: Chrome Enterprise Guide and Chrome Secure Configuration: Enterprise Best Practices.
Fast checks that save time .
- Update Chrome first: Security settings and menus shift over time. Use Update Chrome safely.
- Confirm you’re in the right profile: Hardening the wrong profile is a classic mistake (especially on shared PCs).
- Inventory extensions: If you have more than ~10 extensions, extension risk usually dominates your threat model.
- Decide on sync: Sync can be convenient, but it also expands your “blast radius” if your account is compromised. Start with: Chrome Account Sync Settings and Disable Chrome Sync.
Baseline in 10 minutes (best ROI) .
If you only do one section of this guide, do this. These changes deliver the highest security improvement per minute and are easy to roll back.
- 1 Run Safety Check: Chrome → Settings → Privacy and security → Safety check → run it and resolve what it flags (updates, passwords, risky extensions). :contentReference[oaicite:6]{index=6}
- 2 Set Safe Browsing to Enhanced protection if acceptable for your privacy needs, otherwise keep Standard (don’t turn protection off unless you’re troubleshooting a false positive). :contentReference[oaicite:7]{index=7}
- 3 Enable Secure DNS (DNS over HTTPS): Settings → Privacy and security → Security → Use secure DNS. Choose a provider you trust. :contentReference[oaicite:8]{index=8}
- 4 Reduce extension risk: remove anything you don’t actively use weekly, then limit remaining extensions to “On click” or “On specific sites” where possible.
- 5 Lock down permissions: Settings → Privacy and security → Site settings → review Camera, Microphone, Location, and Notifications. Switch defaults to “Ask” or “Blocked” and keep a short allow list.
- 6 Decide on sync: if this is a shared computer or high-risk profile, don’t sync everything. Prefer separate profiles for work vs personal, and consider disabling sync entirely. Start here: Disable Chrome Sync.
What “success” looks like: Safety Check shows no urgent warnings, Safe Browsing is on, Secure DNS is enabled, your extension list is short, and permissions are mostly “Ask/Blocked” with a small allow list.
Related (deep dives): Chrome Security Checkup, Safe Browsing Settings, Chrome Secure DNS Setup, Chrome Site Permissions.
Step-by-step: full Chrome hardening checklist .
This section is the complete end-to-end hardening path, in the order that minimizes breakage. Treat it like a checklist: do the core items first, then decide how far you want to go.
1) Run Safety Check (fix what Chrome already knows) .
- 1 Open Chrome → ⋮ (three-dot menu) → Settings.
- 2 Click Privacy and security → Safety check.
- 3 Run it. Address findings in this order: Update → Passwords → Extensions → Safe Browsing. :contentReference[oaicite:9]{index=9}
- 4 Re-run once after changes. Your goal is “no urgent items” (some info messages are normal).
2) Set Safe Browsing to match your risk .
Safe Browsing is one of the biggest protective layers for normal users. It can warn you about dangerous sites and downloads. Enhanced mode typically provides stronger detection, but it may share more security-related data to improve protection. Choose based on your risk and privacy comfort level. :contentReference[oaicite:11]{index=11}
- 1 Settings → Privacy and security → Security.
- 2 Under Safe Browsing, pick one: Enhanced protection (stronger), Standard protection (balanced). :contentReference[oaicite:12]{index=12}
- 3 Avoid turning protection off unless you’re troubleshooting a specific false-positive.
Related: Full walkthroughs: Chrome Safe Browsing Settings and Enhanced Safe Browsing Explained.
3) Enable Secure DNS (DNS over HTTPS) .
DNS is how your browser looks up website addresses. Without protection, networks (or malicious hotspots) can sometimes observe or interfere with these lookups. Turning on Secure DNS encrypts DNS queries to your provider and reduces some network-level snooping and tampering risk. :contentReference[oaicite:13]{index=13}
- 1 Settings → Privacy and security → Security.
- 2 Find Use secure DNS → toggle it on.
- 3 Choose your current provider or set a custom provider (if your environment supports it).
- 4 If a corporate network breaks, revert: toggle Secure DNS off (or “with your current service provider”).
Related: If you want the deeper DNS + privacy explanation, see Chrome DNS over HTTPS Settings, Chrome Secure DNS Setup, and Chrome DNS Privacy Guide.
4) Reduce tracking + tighten privacy defaults .
Hardening isn’t only about malware — tracking and profiling increase risk too (targeted phishing, account correlation, and “who are you?” fingerprinting). A hardened Chrome setup typically minimizes third-party cookies, reduces ad personalization features, and limits silent permission grants.
- 1 Settings → Privacy and security → Third-party cookies.
- 2 Use the strictest setting that doesn’t break your critical sites (many users start by blocking third-party cookies, then allowlist exceptions). If you see a “Do Not Track” toggle, you can enable it, but treat it as a request — not enforcement. :contentReference[oaicite:14]{index=14}
- 3 Review ad privacy controls: Chrome Ad Privacy Settings and Privacy Sandbox Explained.
- 4 For fingerprinting risk, start with: Chrome Fingerprint Protection.
Extension hardening (highest risk area) .
Extensions are the #1 place where a “normal” Chrome setup becomes risky. An extension can often read page content, inject scripts, observe what you type, or access all sites — especially if it has broad permissions. That makes extension hardening the highest-return part of this guide.
Related: Use the hub to go deeper: Chrome Extension Security Check and Extension Permissions Guide.
The “extension diet” (reduce count first) .
- Remove duplicates: multiple ad blockers, multiple screenshot tools, multiple coupon finders.
- Remove “maybe someday”: if you didn’t use it in 30 days, uninstall it.
- Prefer fewer, better tools: one reputable password manager beats three random helpers.
- Separate by profile: keep work extensions in a work profile; keep fun experiments elsewhere.
Permission minimization: limit “All sites” access .
For each remaining extension, try to limit site access to the smallest scope possible. The goal is simple: an extension should only run where it is needed.
- 1 Open chrome://extensions in the address bar.
- 2 For an extension → click Details.
- 3 Find Site access and prefer On click or On specific sites.
- 4 If you must allow “All sites,” do it for a single trusted extension only (and treat it like full software access).
Enterprise-grade approach: allowlist (approved only) .
If you manage a team, the best practice is to stop “everyone installs whatever” and move to an allowlist model: only approved extensions can be installed, and critical extensions can be force-installed if required for security (for example, an SSO helper, DLP agent, or corporate security extension).
Chrome Enterprise supports extension management policies like allowlists and blocklists, and a more powerful unified policy called ExtensionSettings for granular control. :contentReference[oaicite:15]{index=15}
Related: For teams/IT: Chrome Enterprise Extension Management, Extension Allowlist Policy, Extension Blocklist Policy.
Site permissions hardening (camera, mic, location, notifications) .
Site permissions are the “silent failure mode” of browser security. If a random site can show notifications, it can spam you with deceptive alerts. If a site can access your mic/camera, it can create privacy incidents. If location is over-shared, it can increase real-world risk.
Related: Site Permissions Settings, Camera Permission Settings, Microphone Permissions, Location Permissions, Notification Permissions.
Recommended defaults (simple + strong) .
- Notifications: Block by default (allow only your calendar/chat if needed).
- Location: Ask (or block if you rarely use it).
- Camera/Microphone: Ask by default, keep a short allow list for known meeting tools.
- Pop-ups/redirects: Block (only allow for payment providers or enterprise portals that require it).
- Background sync: Keep off unless you need it (less background activity = less risk). See: Chrome Background Sync Settings.
Step-by-step: permission review sweep .
- 1 Settings → Privacy and security → Site settings.
- 2 Open Notifications → set default to blocked → remove unknown sites from “Allowed.”
- 3 Open Location, Camera, Microphone → set to Ask → keep only known sites allowed.
- 4 Open Pop-ups and redirects → block. Add exceptions only if you understand why.
- 5 (Optional) Review “Additional permissions” like clipboard, USB devices, serial ports — these matter most for developers and enterprise apps.
Network hardening (Secure DNS, HTTPS, public Wi-Fi) .
Network hardening is about reducing what networks can observe or manipulate. This matters most on public Wi-Fi, travel networks, shared buildings, and any environment where you don’t fully trust the router or DNS path.
Secure DNS recap .
Keep Secure DNS enabled unless it breaks your corporate environment. On Android, Chrome also exposes Secure DNS under Privacy and security → Security. :contentReference[oaicite:16]{index=16}
HTTPS habits that actually help .
- Don’t bypass warnings casually: certificate warnings are rare on legit sites; treat them as a stop sign on public Wi-Fi.
- Prefer typing known domains: for banking/admin portals, type the domain or use a saved bookmark you trust.
- Use separate profiles: keep “random browsing” away from “logged-in admin portal” sessions.
Related: For deeper network privacy: Chrome Network Privacy Settings, Public Wi-Fi Security Tips, Secure Wi-Fi Browsing.
VPN vs Secure DNS vs “proxy extensions” (quick reality check) .
This comes up constantly: Secure DNS protects DNS queries; a VPN can encrypt more traffic depending on setup; “free proxy extensions” are often the riskiest option because they sit inside the browser and may see everything.
- Secure DNS: improves DNS privacy and can reduce tampering risk. It does not hide all traffic.
- VPN app: can protect wider network traffic, especially on public Wi-Fi. Choose reputable providers.
- Browser proxy/VPN extension: convenient but can be high risk if untrusted; treat it like a privileged extension.
Related comparisons: VPN vs Private DNS, VPN vs Proxy for Chrome, VPN vs Antivirus for Chrome.
Advanced hardening for power users & enterprise .
This section is where you earn “security team” level outcomes: policy baselines, separate profiles, risk-based workflows, and controls that scale. If you’re a power user, you can adopt these manually. If you’re an IT admin, you can enforce them using Chrome Enterprise policies. :contentReference[oaicite:17]{index=17}
Related: If you’re managing Chrome, start at Chrome Enterprise Guide and Chrome Enterprise Security Settings.
A) Use separate profiles as a security boundary .
Chrome profiles are underrated as a hardening tool. Separate profiles mean separate cookies, sessions, extensions, saved passwords, and “who you are” signals.
- Work profile: only work extensions, only work accounts, minimal personalization.
- Personal profile: normal browsing, entertainment, shopping.
- Testing profile: new extensions and “try it once” websites go here.
B) Policy-driven extension control (allowlist + defaults) .
In enterprise environments, extension sprawl becomes a security and compliance problem. The hardening move is to define what’s allowed and block everything else by default. Chrome Enterprise exposes policies such as allowlists/blocklists and the more granular ExtensionSettings policy for installation and permission control. :contentReference[oaicite:18]{index=18}
- Allowlist: only approved extensions can be installed. :contentReference[oaicite:19]{index=19}
- Blocklist: explicitly block known risky categories (coupon injectors, unknown proxy tools, shady downloaders). :contentReference[oaicite:20]{index=20}
- Force install: enforce critical security tooling where needed (cannot be removed by users). :contentReference[oaicite:21]{index=21}
- Default policy: set a safe default for “all other extensions” using ExtensionSettings. :contentReference[oaicite:22]{index=22}
Related: Extension Installation Policy, Extension Management (Enterprise), Managed Browser Security.
C) Harden account and password surfaces .
Most browser “hacks” are actually account compromises. Hardening Chrome should include password hygiene and breach monitoring, whether you use Chrome’s built-in manager or a dedicated password manager.
- Run: Chrome Password Checkup and Password Leak Detection.
- For serious setups, consider a dedicated manager (teams, role-based access, SSO, audit logs).
High-intent next step: If you’re choosing a manager: Best Password Manager for Chrome.
D) “Secure browsing” in businesses: think in layers .
In business environments, Chrome hardening typically sits inside a larger security stack. You don’t need every tool, but you should understand the layers decision-makers compare:
- Browser hardening (this guide): reduce attack surface in Chrome itself.
- Endpoint protection / EDR: detects malware on the device.
- Identity controls: MFA, conditional access, SSO, device compliance checks.
- Network security: secure web gateways, DNS filtering, SASE, ZTNA.
- Browser isolation: risky content opens in an isolated environment (high-security orgs).
Related comparisons: Endpoint Security vs Browser Security, VPN vs Zero Trust Browser, Secure Browser vs Virtual Browser, Browser Isolation vs VPN.
Common alternatives users compare .
- Chrome built-in settings vs third-party privacy extensions
- Chrome password manager vs dedicated password managers
- Free VPN extensions vs premium VPN services
- Manual configuration vs enterprise policy management
Privacy & security notes (tradeoffs explained) .
Hardening is mostly a set of tradeoffs. You’re balancing three things: security (prevent compromise), privacy (reduce tracking/telemetry), and compatibility (avoid breaking sites). The best setup is the one you’ll actually keep enabled.
Impact: Affects site compatibility (cookies/permissions), detection strength (Safe Browsing mode), and network privacy (Secure DNS).
Related: If you suspect infection or hijacking, use: Remove Malware from Chrome. If you’re hardening for tracking risk, start with: How to Stop Chrome Tracking.
Recommended baseline settings .
- Option A (balanced): Safe Browsing = Standard, Secure DNS = On, third-party cookies restricted, notifications blocked, extensions minimized.
- Option B (maximum security): Safe Browsing = Enhanced, Secure DNS = On, strict permissions, separate profiles, tight extension allowlist.
- Option C (compatibility): Safe Browsing = Standard, Secure DNS = On (or provider-based), third-party cookies allowed only with exceptions, conservative permission blocks.
Recommended settings by goal .
| Goal | Recommended setting | Tradeoff | Best for |
|---|---|---|---|
| Balanced | Standard Safe Browsing + Secure DNS + strict permissions | Some site prompts; minor friction | Most users |
| Maximum security | Enhanced Safe Browsing + minimal extensions + allowlisted permissions | More detection telemetry; more setup | High-risk users, admins |
| Compatibility | Standard Safe Browsing + selective cookie/permission exceptions | More tracking surface; fewer blocks | Banking / enterprise portals |
Troubleshooting + safe rollbacks .
If hardening breaks something, don’t panic. The correct approach is almost always: (1) identify which layer broke the workflow, (2) roll back that layer for a single site if possible, and (3) keep the global baseline intact.
Related: If your issue smells like permissions, start with: Site Permissions. If it smells like malware (redirects/popups), start with: Browser Hijacker Removal.
If a website won’t log in or keeps signing you out .
This is usually cookie or privacy setting friction. Fix it without weakening everything:
- Add a site exception under third-party cookies (allow only that site’s needed cookies).
- Try a clean test: open an incognito window; if it works there, an extension is often the culprit.
- Temporarily disable one extension at a time (start with coupon, shopping, “security,” and proxy tools).
If Secure DNS breaks corporate sites or captive portals .
Some corporate networks expect specific DNS behavior. Roll back carefully:
- Switch Secure DNS to “with your current service provider,” or toggle it off temporarily.
- If you’re on public Wi-Fi, finish the portal login first, then re-enable secure settings.
If Chrome feels slower after hardening .
Hardening rarely causes major slowdowns, but extensions can. Your best performance/security win is usually uninstalling heavy extensions and limiting background behavior.
Related: Speed Up Google Chrome and Extension Security Check.
If you need to reset safely (without losing everything) .
Use a staged reset approach:
- Stage 1: Disable extensions (don’t wipe data yet). If symptoms stop, it’s extension-related.
- Stage 2: Clear browsing data (cookies/site data) for the affected site only: Clear Browsing Data.
- Stage 3: If you suspect infection, follow a full cleanup guide: Chrome Malware Cleanup Guide.
FAQ .
-
helpIs Chrome hardening the same as using a VPN?No. A VPN primarily changes and/or encrypts network routing, while hardening reduces browser attack surface (permissions, extensions, Safe Browsing, and tracking controls). Many people use both: hardening for browser risk, VPN for hostile networks and privacy needs.
-
helpShould I always use Enhanced Safe Browsing?Enhanced Safe Browsing can provide stronger protection signals, but it may share more security-related data to improve detection. If you’re high risk (admin portals, frequent downloads, public Wi-Fi), Enhanced is often worth it. If you’re privacy-sensitive, Standard is still a solid baseline. :contentReference[oaicite:24]{index=24}
-
helpWhat’s the #1 hardening change most people miss?Extension discipline. People harden cookies and DNS but keep 25 extensions with broad “All sites” access. Reduce extension count first, then limit site access. It’s the most common real-world risk multiplier.
-
helpHow do businesses harden Chrome at scale?They enforce baselines using Chrome Enterprise policies: extension allowlists/blocklists, default settings via policy, and managed configurations. This reduces risk and helps meet compliance expectations where browsers are in scope. :contentReference[oaicite:25]{index=25}
Sources & further reading .
- Google Chrome Help: Manage Chrome safety and security (Safety Check, Safe Browsing)
- Google Safety: Chrome Privacy & Security overview
- Chrome Enterprise: Policy list (management + security baselines)
- Google Admin Help: Set Chrome app and extension policies
- Google Admin Help: Configure ExtensionSettings policy
Disclosure: Some pages may mention tools or services. Recommendations are editorial and based on practical testing and security best practices.