What Autofill security settings are (and why they matter) .
Autofill is convenience. Security is making sure convenience doesn’t become a shortcut for attackers.
Chrome Autofill is a set of features that can save and automatically fill passwords, addresses, contact info, and payment details. Done well, Autofill reduces password reuse, speeds up checkout, and helps you avoid typos that lock you out of accounts. Done poorly, Autofill can increase exposure on shared devices, leak personal data into the wrong form, or make it easier for an attacker to use your unlocked browser session to place orders or access sensitive accounts.
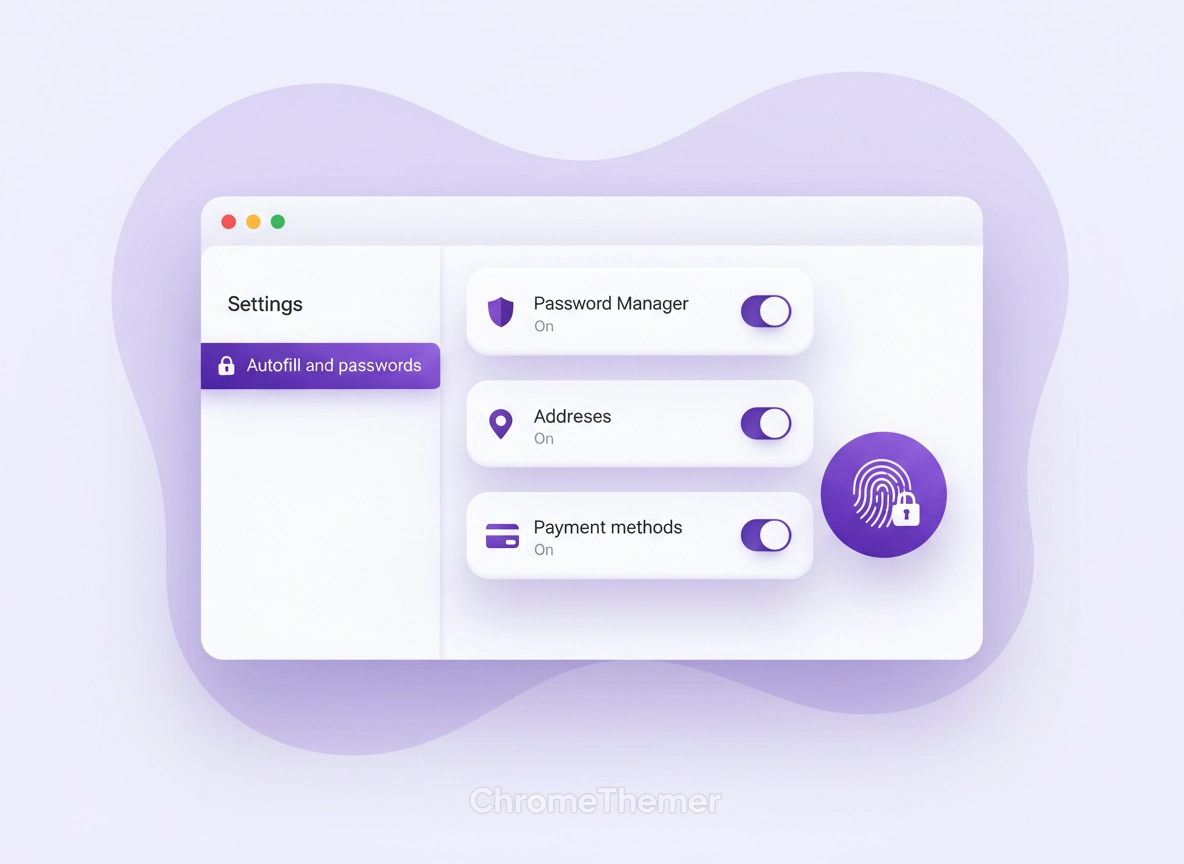
The security problem isn’t Autofill itself—it’s where the saved data lives, when it fills, and what proof-of-user is required. Chrome now splits Autofill into distinct areas in Settings → Autofill and passwords: Google Password Manager (passwords & passkeys), Addresses and more, and Payment methods. Each has its own toggle(s), its own risk profile, and its own “best practice” depending on your threat model.
A realistic way to think about Autofill security is to ask: “If my device is unlocked for 60 seconds, what could someone do?” Many real-world incidents aren’t “Hollywood hacks”; they’re opportunistic actions on an unlocked device, a borrowed laptop, a shared family PC, or a work machine used by multiple people. Autofill becomes dangerous when it can fill highly sensitive data without friction.
Related (cluster spine): Start with the broader overview: Chrome Privacy & Security Settings Overview, then build your baseline in Chrome Privacy Settings.
Key terms (quick definitions) .
- Google Password Manager: Chrome’s built-in manager for saved passwords and passkeys (often synced to your Google Account).
- Autofill form data: Saved addresses, phone numbers, emails, and similar form fields (can fill into many websites).
- Payment methods: Saved cards and billing details. Depending on settings, Chrome may request verification before filling.
- Security code (CVC/CVV): The 3–4 digit card code. Storing it can reduce checkout friction but changes the risk profile of payment autofill.
- Sync: When Chrome copies data (including passwords and Autofill items) across devices signed into the same Google Account.
- Threat model: Your realistic risks (shared device, travel, remote work, family computer, malware, phishing, enterprise policies).
Before you start (fast checks that prevent mistakes) .
These checks prevent the most common “I changed a setting but nothing happened” problems—and they help you avoid locking yourself out of accounts while hardening security.
- Check your device lock: If your laptop/phone has no PIN, password, fingerprint, or face lock, Autofill security will always be weaker. Device lock is your first line of defense.
- Know if you’re signed into Chrome: In Chrome, click your profile icon (top-right). If you’re signed in, Autofill data may be connected to your Google Account and Sync.
- Confirm whether the device is shared: If multiple people use the same OS login, do not rely on Chrome-only settings—create separate OS accounts and separate Chrome profiles.
- Understand your “must keep” items: If you’re about to disable password saving, export or migrate carefully if you use Chrome as your primary manager (see below for safe options).
- Update Chrome first: Settings labels and security prompts change. Use the latest stable build before you decide something is “missing.”
Related: If your core worry is account takeover, start here: Chrome Account Security Settings, plus Chrome Two-Factor Authentication Guide.
Also, take 30 seconds to check whether this browser is used for high-risk activity (banking, business admin panels, payroll, crypto exchanges). If yes, you want stricter Autofill controls and a tighter baseline: Chrome Hardening Guide and Browser Hardening Checklist.
Decide your Autofill “mode” (pick one) .
Most people get better results by picking a mode and applying it consistently across devices.
- Mode A — Balanced (recommended): Password autofill ON (behind device security), addresses ON (personal device only), payment autofill ON but verification required.
- Mode B — Maximum security: Password manager ON (behind device security), addresses OFF, payment autofill OFF, no security codes stored, minimal Sync exposure.
- Mode C — Compatibility / travel: Password manager ON, addresses ON, payment autofill ON, but you rely on OS lock + strong account security (good for frequent checkout users on a personal device).
Step-by-step: the recommended secure setup .
This section is written so you can do it quickly without missing the “hidden” risk: what’s already saved, what Sync copies, and what autofills without asking you.
1) Open the Autofill control center .
- 1 Open Chrome → click ⋮ (top-right) → Settings.
- 2 In the left menu, open Autofill and passwords.
- 3 You should see sections for Google Password Manager, Payment methods, and Addresses and more.
What “success” looks like: You can clearly see separate toggles and management screens for passwords, addresses, and payments. If you only see a subset, you may be in a managed profile or on a mobile variant (see “Common variations” below).
2) Secure password autofill (keep it on, but make it harder to misuse) .
Password Autofill is usually security-positive when it enables unique, long passwords and reduces password reuse. The problem is not passwords being saved—it’s passwords being accessible when they shouldn’t be (shared device, weak device lock, compromised account).
- 1 Go to Settings → Autofill and passwords → Google Password Manager.
- 2 Open Settings inside Password Manager and review:
- Offer to save passwords (ON for most users; OFF on shared/public machines)
- Auto sign-in (OFF if you want an extra friction step; ON if your device lock is strong and the device is personal)
- 3 Run a safety review:
- Use Chrome Password Checkup for reused/weak passwords.
- Enable breach alerts / leak detection where available: Chrome Password Leak Detection.
3) Lock down address & identity autofill (addresses, phone, email) .
Address Autofill is the most “quietly risky” feature because it can leak personal identity data into forms you didn’t intend to complete. It’s not just convenience—addresses, emails, and phone numbers can be used for account recovery, social engineering, and targeted phishing.
- 1 Go to Settings → Autofill and passwords → Addresses and more.
- 2 For a personal device (balanced mode): keep Save and fill addresses ON, but remove old/unused entries.
- 3 For shared devices (maximum security mode): turn Save and fill addresses OFF.
- 4 Review what’s saved and delete anything sensitive (old home addresses, secondary numbers, work locations).
4) Secure payment autofill (require verification + reduce stored secrets) .
Payment Autofill is where the highest “instant impact” risk lives: if a device is unlocked, payment autofill can enable purchases in seconds. Chrome gives you two big levers: verification before filling and whether Chrome saves card security codes.
- 1 Go to Settings → Autofill and passwords → Payment methods.
- 2 Decide whether to keep Save and fill payment methods ON:
- ON (personal device): fastest checkout; you must rely on device lock + account security.
- OFF (shared/work/public devices): safest. Manually type card details or use a dedicated payment provider flow.
- 3 Turn ON verification where available (often labeled like Verify that it’s you before autofill):
- This usually uses your device unlock method (PIN/biometric) to confirm you’re the person filling the card.
- It doesn’t make you invincible, but it blocks the “someone used my unlocked browser” scenario.
- 4 Consider turning OFF Save security codes (CVC/CVV) if your risk is higher than your convenience needs.
- 5 Review saved cards and remove anything you don’t want stored in the browser session.
Payment security deep dive: If you want a stricter baseline and a clear “what can leak” analysis, see: Chrome Payment Method Security and Chrome Data Breach Protection.
5) Clear existing Autofill data (the part people forget) .
Turning toggles OFF stops future saves and fills—but it doesn’t always remove what’s already stored locally or in your account. If your goal is “this device should not have stored identity data,” you must also clear the saved items.
- 1 Review and delete saved items inside each section (Password Manager, Addresses, Payment methods).
- 2 Clear local form-fill traces: open Settings → Privacy and security → Clear browsing data, then select Autofill form data (and review what else you clear).
- 3 If you use Sync, confirm whether data is also stored in your Google Account—then remove it there if needed.
Common variations (Windows, macOS, Android, iPhone) .
- Windows / ChromeOS: Most options appear in Settings → Autofill and passwords. Device verification uses Windows sign-in / ChromeOS lock methods.
- macOS: Similar menus, but verification is tied to macOS credentials / Touch ID when configured. If you use iCloud Keychain alongside Chrome, be explicit about which manager you trust.
- Android: Payment and address toggles exist inside Chrome settings. Password behavior may depend on Android’s system Autofill service (Google or a third-party manager).
- iPhone/iPad: Autofill often involves iOS Autofill (Keychain) and Chrome’s own settings. Decide which store is primary to avoid confusion.
Related (sync risk): Autofill gets more complicated when it syncs across devices. If you want a clear, security-first explanation, read: Chrome Account Sync Settings and Chrome Sync Security Risks.
Advanced Autofill hardening (power users + enterprise) .
If you’re reading this section, your goal is usually one of these: (1) reduce the “blast radius” of a compromised session, (2) separate identities (work vs personal), (3) prevent unsafe autofill behavior on risky sites, or (4) enforce a consistent baseline for a team.
Related: If you’re building a stronger baseline beyond Autofill, start here: Default Chrome Security Settings Guide and Chrome Security Checkup.
Hardening strategy 1: Separate profiles (the cleanest security win) .
Chrome profiles are one of the most underrated controls for Autofill safety. A profile separation strategy prevents accidental autofill (personal addresses filling into work forms), reduces cross-contamination, and makes it easier to keep strict settings where needed.
- Work profile: business email, work addresses, no personal cards, stricter extension policy.
- Personal profile: personal passwords, personal addresses, personal payments (with verification).
- High-risk profile: banking/admin tasks only, minimal extensions, strict autofill or manual entry.
If you want a practical setup guide: Chrome Profile Privacy Setup and Chrome Secure Profile Setup.
Hardening strategy 2: Remove stored payment “secrets” .
Storing payment cards is already sensitive. Storing security codes can be a step further—because it reduces the number of “proof” steps required during checkout. If your risk model includes shared access, travel, or frequent device unlocking in public spaces, consider:
- Turn off saving security codes so the browser never stores a key payment factor.
- Require verification before payment autofill so a quick unlock doesn’t equal a quick purchase.
- Keep only 1–2 cards (or none) in the browser; remove old cards you never use.
Security mindset: Autofill should never be “the easiest way to spend money” when your device is unattended. If you travel or work in public spaces, this one change can remove a whole class of opportunistic abuse.
Hardening strategy 3: Reduce “autofill on the wrong site” risk .
A lot of autofill fear comes from one scenario: a phishing page or sketchy form “asks for details” and the browser offers to fill. While Autofill isn’t the only risk factor in phishing, you can make it harder to misuse:
- Prefer password manager autofill over typing—good managers fill only on the correct domain.
- Use Enhanced Safe Browsing (if it matches your privacy preference) to get stronger warnings: Enhanced Safe Browsing and Safe Browsing Settings.
- Keep extensions minimal because some extensions can read form data: Extension Permissions Guide.
- Use HTTPS-Only Mode to reduce downgrade risks: Chrome HTTPS-Only Mode.
Hardening strategy 4: Sync with intention (or don’t) .
Sync is convenient—but it also expands where your Autofill data lives. If your Google Account is compromised, Sync can turn one device incident into multiple devices impacted. The clean security approach is:
- Limit Sync data types (sync passwords but not payments/addresses, depending on your needs).
- Use strong account security (2FA, passkeys, recovery controls).
- Disable Sync entirely on devices you don’t fully trust.
Related: For a deep explanation and “what attackers actually do,” read: Chrome Sync Security Risks and Disable Chrome Sync.
Enterprise notes: managed devices, policies, and why settings might be locked .
If you’re on a company laptop or a managed Chromebook, Autofill settings may be controlled by policy. You may see toggles that are greyed out, missing options, or enforced requirements. This is normal in environments with compliance requirements (finance, healthcare, legal, government, regulated SaaS).
- Policy-controlled behavior: password saving disabled, payment autofill disabled, forced re-auth before filling, restricted profile sign-in, or disabled Sync.
- Security intent: prevent data leakage from corporate accounts, enforce separation of work/personal identity, reduce insider risk.
- What to do: don’t fight the policy. If it blocks your workflow, request an approved solution through IT.
Enterprise guides: Chrome Enterprise Security Settings, Chrome IT Admin Security Settings, and Chrome Security Policy Setup.
Common alternatives users compare .
- Chrome built-in Autofill vs dedicated password managers (security features, sharing, admin controls)
- Chrome Password Manager vs third-party “zero-knowledge” managers
- Browser-saved payment methods vs wallet-based checkout flows
- Manual entry vs enterprise policy enforcement (compliance vs convenience)
Related comparisons: Password Manager vs Chrome Passwords and Chrome Password Manager vs Third-Party.
Privacy & security notes (risk model + baseline) .
Autofill is both a privacy feature and a security feature. Privacy is about where personal data goes; security is about who can use it. Your safest setup depends on which of these scenarios is most realistic for you:
- Shared device risk: family computer, shared OS login, borrowed laptop, public workstation.
- Unlocked device risk: you step away for a moment; device remains unlocked; browser session is active.
- Account compromise risk: attacker gets into Google Account → Sync spreads data or makes it accessible.
- Malware / extension risk: malicious software or over-privileged extensions reading form data.
- Phishing risk: fake sites that try to get you to fill sensitive details.
Impact: Can expose identity details (addresses, phone, email) and enable payment misuse if verification is not enforced.
Related: If you suspect a hijack, malicious extension, or unwanted behavior, go here: Remove Malware from Chrome and Remove Unwanted Extensions.
Recommended baseline settings .
- Option A (balanced): Password manager ON · Auto sign-in OFF (optional) · Addresses ON (personal device) · Payment methods ON + verification ON · Security codes OFF if you want less stored secret.
- Option B (maximum security): Password manager ON (behind device lock) · Addresses OFF · Payment methods OFF · Security codes OFF · Sync minimized or off on high-risk devices.
- Option C (compatibility): Password manager ON · Addresses ON · Payment methods ON · Verification ON · Sync allowed with strong account protection (2FA/passkeys).
Recommended settings by goal .
| Goal | Recommended setting | Tradeoff | Best for |
|---|---|---|---|
| Balanced | Password manager ON; Addresses ON (personal); Payment autofill ON + verification | Small friction during checkout | Most users on a personal, locked device |
| Maximum security | Addresses OFF; Payment autofill OFF; no security codes stored; Sync limited | More manual entry | Shared devices, finance/admin users |
| Compatibility | Addresses ON; Payment autofill ON; verification ON; strong device lock | More data stored in browser/account | Frequent checkout users on a trusted device |
Troubleshooting .
Related: If this feels like “Chrome is acting weird” (popups, redirects, settings changing), start here: Chrome Security Audit Guide and Chrome Security Reset.
If Autofill options are missing or greyed out .
This usually happens for one of three reasons: (1) you’re on a managed device/profile with enterprise policies, (2) a browser extension is interfering, or (3) you’re looking in the wrong “owner” layer (Chrome vs OS-level autofill on mobile). First, check for “Managed by your organization” in Chrome settings. If present, policies can lock Autofill behavior. For extension interference, temporarily disable extensions and retest: Chrome Extension Security Check.
If Chrome keeps autofilling even after you turned it off .
Two common causes: (1) the setting is off, but you still have saved items and “form suggestions” from history, or (2) a third-party password manager / OS autofill service is filling instead of Chrome. Do a full cleanup: delete saved entries (addresses/cards), clear “Autofill form data” in Clear browsing data, and verify your OS autofill service settings. If you rely on a third-party manager, confirm it’s configured as the preferred autofill service on mobile.
If payment autofill doesn’t ask for verification (and you want it to) .
Verification prompts depend on device lock methods, whether payment autofill is enabled, and the platform. Make sure the device has a screen lock set. Then check Payment methods settings for a verification toggle. If you still don’t see it, update Chrome and restart. Also note that some checkout flows trigger their own verification, and saved cards in wallet/account may behave differently than purely local cards.
If passwords stop autofilling (or Password Manager looks “broken”) .
First confirm you’re in the correct Chrome profile and you’re signed into the expected Google Account (if you use Sync). Next, check Password Manager settings: if “Auto sign-in” or autofill toggles are off, behavior changes. If the issue is new after an update, disable extensions and test in Incognito. As a last resort, run a basic health check: Chrome Security Checkup.
If you need to reset safely (without losing everything) .
If you suspect compromise, avoid “panic resets” that destroy evidence or wipe useful data you actually need. Instead, follow a controlled approach: change Google Account password + enable 2FA, review devices signed into your account, remove unknown extensions, and only then decide whether to clear Autofill or disable Sync. See: Identity Protection Guide and Passwords Stolen: What to Do.
FAQ .
-
helpIs Chrome Autofill safe to use?It can be safe on a personal, locked device with a secure Google Account. Password autofill is often a net security win. The risky parts are addresses and payments on shared/unlocked devices, and broad Sync exposure. Use verification for payments, remove unnecessary saved items, and separate profiles for work vs personal.
-
helpShould I turn off “Save security codes” (CVC/CVV)?If your risk model includes shared devices, travel, or frequent unlocked sessions, turning it off reduces stored “payment secrets.” You’ll type the code more often, but you lower the chance that an unlocked session can complete checkout instantly.
-
helpWhy does Chrome Autofill show suggestions on phishing sites?Autofill suggestions can appear when a page looks like a form field Chrome recognizes. This is why you should rely on domain-aware password managers for logins, use Safe Browsing protections, and avoid keeping payments/addresses enabled in higher-risk contexts. Always verify the domain before filling anything sensitive.
-
helpIf I turn Autofill off, does it delete my saved info?Not always. Turning toggles off typically stops future saving/filling, but existing saved items may remain until you delete them. If you want the data removed, delete entries inside each Autofill section and clear “Autofill form data” in Clear browsing data. If Sync is enabled, review what’s stored in your account too.
-
helpWhat’s the safest way to use Autofill on a shared computer?The safest approach is separate OS accounts and separate Chrome profiles. In Chrome, disable address and payment autofill, keep password manager only if it’s behind strong device security, and avoid enabling Sync. If the machine is truly public, don’t store anything—use temporary sessions.
-
helpDoes Chrome Autofill work the same on Android and iPhone?Not exactly. On mobile, Autofill is influenced by the OS-level autofill service (Google or a third-party manager) and Chrome’s own settings. If behavior feels inconsistent, confirm which service is responsible for filling and align settings in both places.
Sources & further reading .
- Google Chrome Help: Manage payment info in Chrome (desktop)
- Google Help: Manage payment info in Chrome (Android)
- Google Chrome Help: Fill out forms automatically in Chrome (Android)
- Google Password Manager: overview
- Google Developers Blog: Chrome on Android and third-party autofill services
Disclosure: Some pages may mention tools or services. Recommendations are editorial and based on practical testing and security principles.